Kenobi
Walkthrough on exploiting a Linux machine. Enumerate Samba for shares, manipulate a vulnerable version of proftpd and escalate your privileges with path variable manipulation.
Try this exercise in TryHackMe: Kenobi
Deploy the vulnerable machine
Run an initial nmap scan to know how many open ports
nmap -sV -sC 10.10.X.X -oN ~/kenobi/nmap-initial


Enumerating Samba for shares
Samba is the standard Windows interoperability suite of programs for Linux and Unix. It allows end users to access and use files, printers, and other commonly shared resources on a company's intranet or internet. It is often referred to as a network file system.
Samba is based on the common client/server protocol of Server Message Block (SMB). SMB is developed only for Windows, without Samba, other computer platforms would be isolated from Windows machines, even if they were part of the same network.
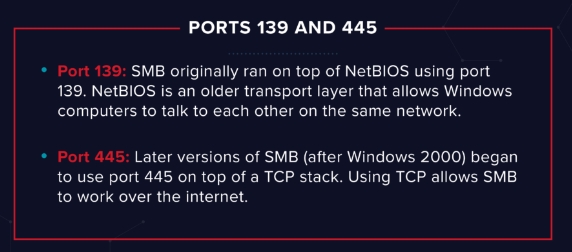
SMB has two ports, 445 and 139.

Using nmap we can enumerate a machine for SMB shares.
Nmap can run to automate a wide variety of networking tasks. There is a script to enumerate shares!

Let'sOn most distributions of Linux smbclient is already installed. Lets inspect one of the shares:

You can recursively download the SMB share too. Submit the username and password as nothing.
Open the file on the share. There are a few interesting things found.
Information generated for Kenobi when generating an SSH key for the user
Information about the ProFTPD server.
Since smbget -R smb://10.10.X.X/anonymous is not working on my Kali machine, we’ll use mget * to download all files from the current remote directory


We can also use this, as an alternative, to extract the log.txt file to our machine:

The earlier nmap port scan will have shown port 111 running the service rpcbind. This is just a server that converts remote procedure call (RPC) program numbers into universal addresses. When an RPC service is started, it tells rpcbind the address it is listening to and the RPC program number it's prepared to serve.
In our case, port 111 is access to a network file system. Let's use nmap to enumerate this.

Gain initial access with ProFtpd
To get the version of ProFtpd, use netcat to connect to the machine on the FTP port.

We can use searchsploit to find exploits for a particular software version. Searchsploit is basically just a command line search tool for exploit-db.com.

You should have found an exploit from ProFtpd's mod_copy module.
The mod_copy module implements SITE CPFR and SITE CPTO commands, which can be used to copy files/directories from one place to another on the server. Any unauthenticated client can leverage these commands to copy files from any part of the filesystem to a chosen destination.
We know that the FTP service is running as the Kenobi user (from the file on the share) and an ssh key is generated for that user.
We're now going to copy Kenobi's private key using SITE CPFR and SITE CPTO commands.
SITE CPFR /home/kenobi/.ssh/id_rsa specifies the source file/directory to use for copying from one place to another directly on the server
SITE CPTO /var/tmp.id_rsa specifies the destination file/directory to use for copying from one place to another directly on the server


Lets mount the /var/tmp directory to our machine:


We now have a network mount on our deployed machine! We can go to /var/tmp and get the private key then login to Kenobi's account.


We’ll get the user.txt file

Privilege Escalation with Path Variable Manipulation
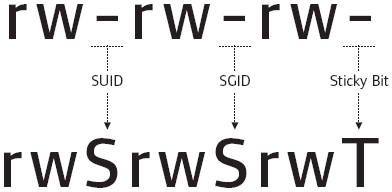
Let's first understand what SUID, SGID, and Sticky Bits are.

Permission
On Files
On Directories
SUID Bit
User executes the file with permissions of the file owner
-
SGID Bit
User executes the file with the permission of the group owner.
File created in directory gets the same group owner.
Sticky Bit
No meaning
Users are prevented from deleting files from other users.
SUID bits can be dangerous, some binaries such as passwd need to be run with elevated privileges (as it's resetting your password on the system), however, other custom files could that have the SUID bit can lead to all sorts of issues.
To search the system for these types of files run the following:

or use the one below:

Check all paths, and we'll discover that the /usr/bin/menu file looks particularly out of the ordinary.


When we run the /usr/bin/menu binary, the readable options are:


Strings is a command on Linux that looks for human-readable strings on a binary.
This shows us the binary is running without a full path (e.g. not using /usr/bin/curl or /usr/bin/uname).
As this file runs as the root users privileges, we can manipulate our path gain a root shell.
We copied the /bin/sh shell, called it curl, gave it the correct permissions, and then put its location in our path. This meant that when the /usr/bin/menu binary was run, its using our path variable to find the "curl" binary. Which is actually a version of /usr/sh, as well as this file being run as root it runs our shell as root!

We successfully got root access, let’s enumerate and see interesting information and files.


Enumerate the server and we'll find the flag in root.txt

Last updated
Was this helpful?


